PowerShell Terminal Setup
I just got back from Midwest Management Summit (MMS MOA), and I was a little surprised how many people wanted to know how I setup my terminal. I figured that since I had to read a couple of blog posts to get exactly the setup that I was after, this deserved a blog post.
To start off, there’s lots of ways to customize your setup, this is just the way that worked for me. I like the visuals… and I really just love pink — shocking, I know… ;)
Adam Driscoll’s video on getting started with Oh My Posh was honestly the best resource that I found on getting setup. If you haven’t watched it already, highly recommend. Most of what I’ll be covering is already covered in his video.
If you’d like your terminal to look like mine, where you can see that you’re a commit behind:

Or just easily see that you’re on a branch that isn’t main:

What we’ll be covering:
Oh My Posh Setup
Installing Custom Fonts
Customizing Oh My Posh
Additional PowerShell Modules that I use
Oh My Posh ✩°。🎧 ✩°。⋆⸜
▄▀▄▀▄▀▄▀▄▀▄▀▄▀▄▀▄▀▄▀▄▀▄▀▄▀▄▀▄▀▄▀▄▀▄▀▄▀▄▀▄▀▄▀▄▀▄▀▄▀▄▀▄▀▄▀▄▀▄▀▄▀▄▀▄▀▄▀▄▀▄
To get started with Oh My Posh on Windows, the step by step directions on the website are pretty easy to follow.
I used Chocolatey to install Oh My Posh

2. Added the commands to initialize Oh My Posh in my profile, but as you can see, it looks awful because icons haven’t been installed.

3. Install a Nerd Font. I chose JetBrainsMono.

4. After you download the zip, install the font and then change it in your terminal settings (either your default settings or per terminal).

Oh My Posh Themes ✩ ♬₊.⋆☾⋆⁺₊✧✩♬
▄▀▄▀▄▀▄▀▄▀▄▀▄▀▄▀▄▀▄▀▄▀▄▀▄▀▄▀▄▀▄▀▄▀▄▀▄▀▄▀▄▀▄▀▄▀▄▀▄▀▄▀▄▀▄▀▄▀▄▀▄▀▄▀▄▀▄▀▄▀▄
To get started with Oh My Posh themes, you’ll want to make sure that you’ve followed the customization steps and choose a theme that you like. I chose the cloud-native-azure.


This looks totally fine but I like more pizzazz want more info when I’m running ls.
Additional PowerShell Modules
Adding Flair ‧₊˚🖇️✩ ₊˚🎧⊹ ♡
▄▀▄▀▄▀▄▀▄▀▄▀▄▀▄▀▄▀▄▀▄▀▄▀▄▀▄▀▄▀▄▀▄▀▄▀▄▀▄▀▄▀▄▀▄▀▄▀▄▀▄▀▄▀▄▀▄▀▄▀▄▀▄▀▄▀▄▀▄▀▄
Now, all of that is great, but the custom settings that I have, I took it a step further with Terminal-Icons after reading Scott Hanselman’s blogpost.

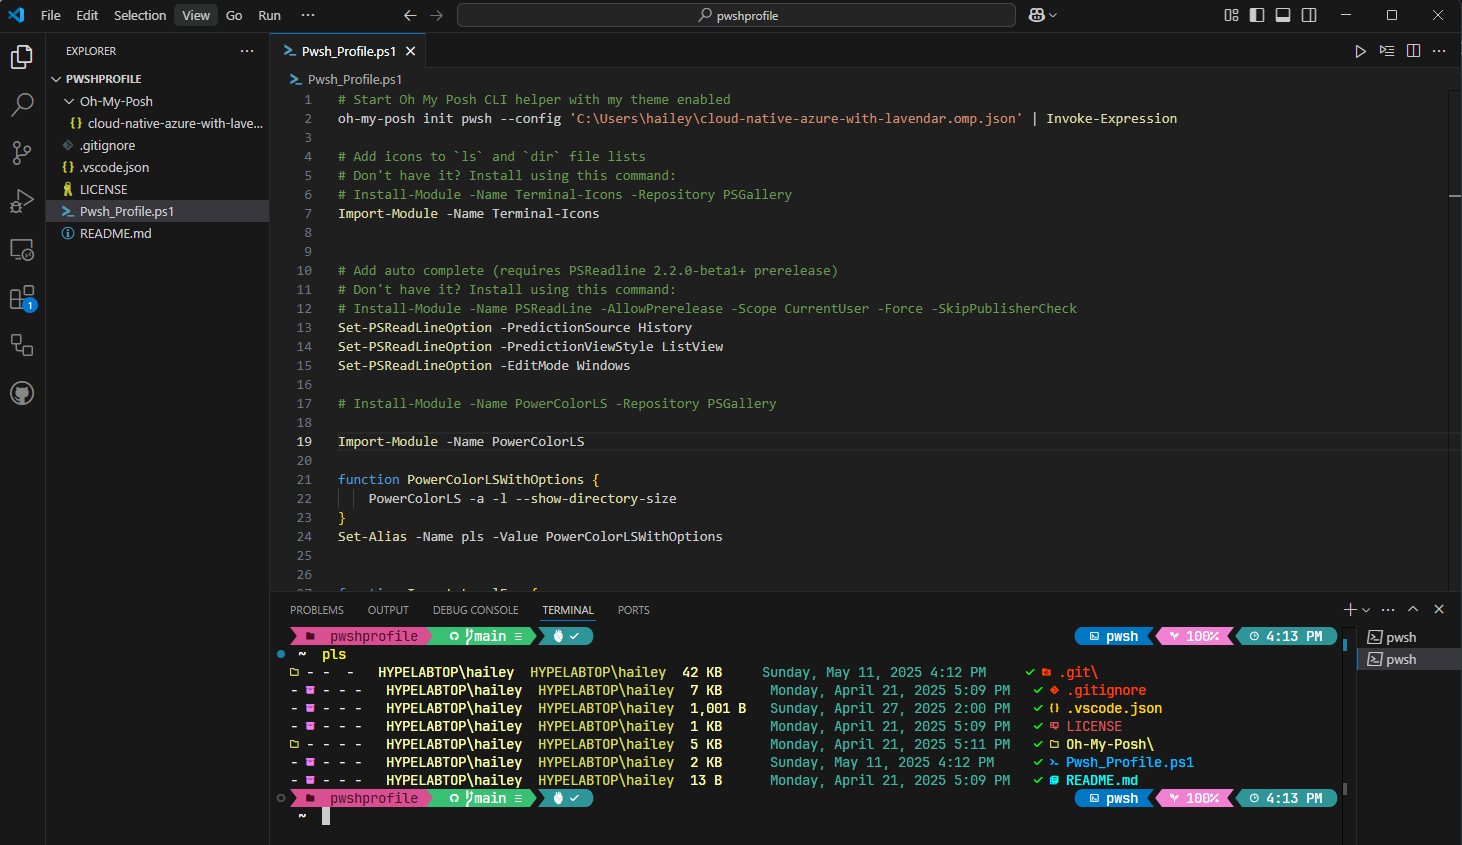
Now, this is the part that I think is really fun… Set-PSReadlineOption and PowerColorLS. You should already have PSReadlineOption if you’re running a at least PowerShell 7. You’ll just want to make sure that you load your preferences in your PowerShell profile. After you’ve installed PSColorLS, this is what you’ll see:

PowerShell Profile
Initial setup ‧₊˚🖇️✩ ₊˚🎧⊹ ♡
▄▀▄▀▄▀▄▀▄▀▄▀▄▀▄▀▄▀▄▀▄▀▄▀▄▀▄▀▄▀▄▀▄▀▄▀▄▀▄▀▄▀▄▀▄▀▄▀▄▀▄▀▄▀▄▀▄▀▄▀▄▀▄▀▄▀▄▀▄▀▄
Alrighty, so now, what does my PowerShell profile look with all of those changes?
I made a few tweaks to the theme and posted them here:
Wrapping Up
Custom Pwsh profile ✩°。🎧 ✩°。⋆⸜
▄▀▄▀▄▀▄▀▄▀▄▀▄▀▄▀▄▀▄▀▄▀▄▀▄▀▄▀▄▀▄▀▄▀▄▀▄▀▄▀▄▀▄▀▄▀▄▀▄▀▄▀▄▀▄▀▄▀▄▀▄▀▄▀▄▀▄▀▄▀▄
Alright, now if you’ve been following along, you’ll have a custom Pwsh Profile. While these aren’t necessary, I think they’re fun and give a nice visual.
The last thing I’ll recommend is to create a repo and save all of your settings in that repo. Makes it so much easier when you’re moving around from machine to machine and can’t remember what you configured.